Monday, November 22, 2010

Making a Heads or Tails Mini-Game(Rm2k/2k3)


Making a Heads or Tails Mini-Game(Rm2k/2k3)
By: Hawkeye  

     Ok so you want to make a, "Heads or Tails mini-game," this is actually very simple: 

1) First off, get yourself a person who's gonna flip the coin, so make an Event and give it the graphic of some random guy. Make the Event Start Condition: Push Key and set the event to Same Level as Hero

2) Next move into the Event Commands Box and make a message, something like; "Let's play Heads or Tails, pick one." And a brief description of the rules.

3) The next command should be a Show Choice command, make it 3 choices. HEADS, TAILS, LEAVE

4) Under the HEADS choice here's what we're going to do. Make a Variable and name it "Heads", then SET it to 0. Then make a new variable called HEAD/TAILS and set it to RANDOM : 0 to 1. Under that make a Fork condition and have it set that if variable HEAD/TAILS is EQUAL to 0 check the add else case. Under that make a message like, "Good Job! You've won!" and in the else case make a message like, "Aw, sorry you lost. Perhaps next time you'll have better luck." 

5) Now after the end case under that TAILS choice here's what we're going to do. Make a variable and name it "Tails", then SET it to 1. Then take the variable called HEAD/TAILS and set it to RANDOM: 0 to 1. Under that make a Fork condition and have it set that if variable HEAD/TAILS is EQUAL to 1 check the add else case. Under that make a message like, "Good Job! You've won!" and in the else case make a message like,  "Aw, sorry you lost. Perhaps next time you'll have better luck." 

The coding's pretty simple so I wont show it to you but you will in the end be using 3 variables and two forks, remember that. You can add betting and losing/gaining money if you want, but that's more into it and I'm sure you can figure it out for yourself. If you're having any trouble I may add the code later and break it down a bit more.


Sunday, November 21, 2010

Project-RPG

     I'm a believer of, "Good work, deserves good mention." So, I'd like to take a moment to talk about a new site trying to get noticed in the community that deserves recognition. Project-RPG has recently updated their site and organized their somewhat chaotic resource section into something quite worthy of checking out. I'm very impressed with the work these game makers are putting into not only their craft and hobby, but something they seem quite passionate about as well. I remember starting Hawk Games the original site back in 2005 and trying desperately to get people to join my forum because I knew we were delivering good content, but the sad thing was that no one else did. That being said, I hope you'll take a moment to browse through Luka's original resources and maybe join the site and forum, give it a nice look over and really appreciate the work that's going into it at : Project RPG Resources

     Here are a couple of randomly picked charsets that caught my attention. Apart from the first one because that's actually a custom one their making for me of my avatar, very well done so far I think. So stop off and give them a look.


     There's not much else new with me and things at the moment. I'm in the middle of packing for a move, so I probably won't be very active this week, but I'll try my best. I'll leave you with another screenshot from: Waterside, my current Rm2k project. This is just another shot of the town, closer to the water with the local women playing some music near the dock.


Rm Link of the post: GamngW Forum: Games Section

Friday, November 19, 2010

Pushing Objects (Rm2k/2k3)


Pushing objects(Rm2k/2k3)
By Hawkeye 

     This is very basic stuff and is meant for mostly newer rm2k users, but it is still useful and it's always good to start with the basics before going complicated. I don't want anyone reading my blog saying it's not good for beginners. If you're making a dungeon, you don't want to be just walking through a maze, you need to put stuff in the way and have obstacles. Some of the best ways to do this is with rocks or barrels that are blocking your Hero's path and he must push them away by pressing Enter

     You can even make the maze out of these and he/she has to push the right ones to get out or else he/she will trap themselves in and have to restart. The possibilities are endless and it's a simple system that when mapped properly can be expanded on. 

     So, make a map of a maze and then make the event that you want the boulder to be. Open it up and set its graphic to a rock, there are some in the rtp, or you can get your own. Next set its Event Start Condition to PUSH key and make sure the event is set to Same Level as Hero. Now in the event commands box you only have one command to put it. Move event. Set the command to this event and make it step away from hero also check off Ignore if can't be moved. The code should look like this...

<>Move Event: This Event Walk Away from Hero

That's it; that's all, so good luck. Like I said simple, but effective. Here's the RTP objects charset you can try it with.


     Now I don't like to advertise Google's ads, but I will highly recommend giving Lord of the Rings: Online a check-out. They've just recently made it free to play and try and upgrade from there. So if you're interested give it a check.

Pushing Through the Bugs

     I'm amazed at how many people there are working on projects for any number of the makers available out there, but it's so sad to see that so few are ever completed or even have demos/intros released. It's said that most independent game designers quit any number of projects 75% through completion. Why? When you're so close do designers become discouraged? Namely because we don't take into consideration the time it will take to work out all the bugs and problems in systems that frankly take the fun out of the project. You have to realize and accept that in making a game, you will enjoy the first half of the creative process: Storyboarding, Creating Characters, Building Maps and creating the basis of your own systems, but with that you have to accept that the second half of creating a game is tedious and frustrating because; it's perfecting your creation and bringing it to a level where you're comfortable having others play and test it.

My advice:

1) Throughout your creative journey, as your building your game get people's interest. Have a support basis of people eager to see your work and continually update them on it. Show screenshots, get feedback, bring in others to get involved in little things. That way, when the way gets tough, you have a group of people pushing you forward to continue your project and make it through the rough, boring time it will take to get it really ready for them.

2) Understand that you're not just making this game for yourself and release a demo. No matter what state the game is in. Compile it and have others play it. That way you have no excuse to say, "Well I never released a demo, so I was never very far along and it's alright to quit now." Your game is going to be played. Period. Trust others. You don't need to respect their opinions, but if you can bring yourself to allow a game to get released in demo form, then you can accept a full release that isn't perfect. The best way to get your game fixed instead of you hoarding it on your computer and testing it a million times is to have several others doing that and you get feedback. You will never get it done if you don't give yourself leeway for error.

3) Have fun. Find new ways always to keep interested. I put hidden Easter eggs in my games whenever I get frustrated. They're never perfect, but it gives me time to take a step back and go, "Oh, this is why I'm doing this again." If you let yourself get frustrated and feel defeated then you will be. So, relax and let loose. You're not the world's greatest designer yet and you're not making any money on this. The whole reason you're using the RPG Makers is because you love doing what it is your doing, so try not to lose sight of that.


     As you can see I'm playing around with the blog a little. I'm testing out this new background and am liking it so far, but please offer your opinions. I've also added a weekly poll to the blog.

Now this isn't really a tutorial, although I have added one for you guys, so check it out. I have a little panorama I use for epic scenes. I find it's much easier than having the Hero walk through a map, to just have them in spot walking while the storyline unfolds and a panorama scrolls by. This one I've used for Epic scenes in, "The Chronicles of Treen" where the Heros were leading their army to battle, so it had a nice effect as a scrolling Panorama with a massive army walking on spot on it.


Rm Link of the post: VG Music

Thursday, November 18, 2010

Changing Your Hero's Clothes(Rm2k/2k3)


Changing Your Hero's Clothes(Rm2k/2k3)

ByHawkeye

      Ever wonder how it is that in some RPGs people have their hero change his/her outfit and none of the stats are modified?

     This isn't as hard as it seems and in this tutorial I'm going to explain: How to make your Hero have a change of clothes. Now this can be greatly modified and have different uses, but here's the one I put to it. So let's say in your house you have a chipset of a dresser lying around, we're going to make it so that when you click on that dresser your Hero can change into another pair of clothes. 

     So, make an Event on the dresser and have the event start condition set to PUSH KEY and it's position set to SAME LEVEL AS HERO. Now in order for this to work you will be needing a charset of your hero in different clothes, so you might want to modify your charset and add that in or get someone else to do it for you. I've just discovered a fabulous Spriter at: Project - Rpg called Luka, who is eager to get some experience in charset editing under his belt. 

     Moving on, in the event commands area insert the first command, a SHOW CHOICE command. Set it to two choices; CHANGE INTO CLOTHING and STAY IN THE CLOTHES YOU'RE WEARING. Under the command of CHANGE INTO CLOTHING insert the command called SET HERO WALK GFX. This command allows you to change your heros graphic without having any stats or anything else changed, just his graphic. Choose which Hero you want changed and the graphic that he's to change in to then click ok.

     Now then you can leave him in these clothes or you could add a switch and make a new page with the same coding, but changing his clothes back to what they were and turn that switch off. As I said earlier you can play around with this quite a bit. I generally have multiple options and you can find hidden wardrobes around towns, it just adds a little extra fun for the Player. At the end of it all though the coding will look like this:


<>Show Choice:CHANGE INTO CLOTHING/STAY IN THE CLOTHES : :YOU'RE WEARING
:[CHANGE INTO CLOTHING]Case
<>Change Hero Walk Graphic:(Alex)Chara 1-2
<>
:[STAY IN THE CLOTHES YOU'RE WEARING]Case
<>
:End Case

Keeping busy and Mapping Tidbits


     So, I'm still busy joining forums and sites and meeting as many people in the community as possible. I extended invitations to several Youtube posters who are making games, but not really members of any site yet and am hoping they'll join to have their projects featured. I've also contacted several independent game designers for interviews, but I won't reveal any names until it's confirmed, so I'm hoping we'll get some good info off of them. Apart from that I've added two new forums to my list of active sites, please feel free to check them out: Creation Asylum & Project RPG.

     I'd like to take a moment to thank the members of Creation Asylum for offering suggestions on improving the blog's layout, so I'm going to be playing with some different background images and color schemes; please don't be scared away if you see an odd arrangement.

     As you can see I don't have a webcomic for this post, so I'd like to have an open invitation to any artist interested in having their work appear on the blog. I'm trying to incorporate as many elements of the community and its members here, so if anyone has a comic they would like posted I encourage you to contact me and we'll get it up here. As you can see it just makes posts more interesting and better to read.

     There are so many small things you can add to your maps to make them not only more appealing to look at, but also more fun for the player. I'm going to use my project: Waterside as example here. For anyone who played Jay's One Stop Pop Shop, you'll remember I had many new systems at the time like being able to choose your wardrobe and change clothes and also I incorporated little things like being able to turn on every lamp post. I now do that in every game. Why? Because it makes boring towns interesting. The more the player can explore, the more they will. So please, and I emphasize this, be creative. Here's an edited charset I made with already several examples for you ready to use.

- Flower boxes that are empty and can be planted/picked
- Mail boxes that receive mail
- Baskets with fruit you can take
- Lamps that can be turned on/off
- Signs that can be read
- Empty counters that can have merchants added
- An entire flower cart that can have a little girl selling flowers
- Mountain and rock edges that grow moss


So use your imagination, it doesn't take an artist to open up a chipset, modify something to make it full/empty, working/broken, bland/colorful.

These little differences make games so much more appealing and interesting.


I'll be adding the charset to the Resources Section along with another set of very useful trees. I've also added a new tutorial, which can be found in the Tutorials Section. As always I'm looking for new projects to review and cover, webcomics to be posted, forums to join and obviously you; members to read hopefully the fun stuff I have to present. Thanks and stay tuned after these messages.

Rm Link of the post: Spriter's Resource

Improving NPC Interaction (Rm2k/2k3)


Improving NPC interaction(Rm2k/2k3)
 
By Hawkeye

      RPG's are quite dull when NPC's(Non-Playable Characters) always repeat the same things over and over again. 


     So, why not improve your Hero's interaction with them by having them give advice or get mad at you. This is a very simple thing to do using only one variable. First off; make an event that you want to be an NPC, let's say a random man down by the water. Set the event start condition to PUSH KEY and position to SAME LEVEL AS HERO and then make the graphic whatever you want. For this tutorial I'll put mine as a random man.

      Next move over to the EVENTS COMMANDS area and insert a CHANGE VARIABLE command. Pick a variable and name it whatever you want; I set mine to TALK. Make sure the Set area is set to "SET" and then make the operand "RANDOM". Make the RANDOM operand set at 1 to 3. The coding afterwards should look somewhat like this...

<>Change Variable: Var[0001:TALK] = Random(1 to 3)

      What we've done so far is: When you click on the NPC it will randomize the variable TALK to 1,2 or 3. Now, let's make him talk. So under the change variable command insert a FORK CONDITIONS command and have it set that if variable TALK is set to " 1 and EQUAL " and uncheck the add else case box. 


     Now inside this command place a message saying something like "Man: Lovely day today isn't it?" or whatever you want one of his messages to say.

      Next after the <>end case make another FORK CONDITION command and have it set that if variable TALK is set to " 2 and EQUAL " and uncheck the add else case box. Now inside this command, place another message that you might want this man to say, for instance; "Man: The water sure looks choppy this evening, don't think it's a good time for sailing..."


      Then last of all after the next <>end case make another FORK CONDITION command and have it set that if variable TALK is set to "3 and EQUAL" and uncheck the add else case box. Now inside this command place another message that you might want this man to say, for instance; "Man: Perhaps you should go visit the old witch down by the beach cove, she's always giving out good advice to weary travelers


     That's it, that's all the coding to it. You could even have him give out different quests or advice or carry on various conversations and for ever random number you have; you make another fork condition. If we had set it to random 1 to 15 you would have to make 15 fork conditions: one for every possible thing he has to say. So in the end our coding looked like this...


<>Change Variable: Var[0001:TALK] = Random(1 to 3)
<>If Var(0001:TALK) 1
<>Message: Man: Lovely day today isn't it?
<>
:EndCase
<>If Var(0001:TALK) 2
<>Message: Man: The water sure looks choppy this
: :evening, don't think it's a good time for
: :sailing...
<>
:EndCase
<>If Var(0001:TALK) 3
<>Message: Man: Perhaps you should go visit the old
: :witch down by the beach cove, she's always giving
: :out good advice to weary travelers
<>
:EndCase

.

Tuesday, November 16, 2010

The search continues

     So in my continuous search for Rpg Making websites I joined another forum, this one solely for RmVX even though I have yet to get into using it. The site is at RpgmakerVX and I highly recommend them if you plan on using VX or are just curious about it as I was. I hope to be as active there as I am now at KobrasRealm, PhanX and RMRK.

     I'm still on the search to find as many active RPG Making communities as is possible. I tried joining GamingW and GamingGroundZero, but their forums are buggy at the moment and don't seem to be getting fixed any time soon.
 
     Taking Companion Wulf's advice I'll now be doing separate posts for the tutorials individually for linking purposes, but you can still check them out in full at the Tutorials Section.

I've added a new Charset, which you can check out at the Resources Section.

If you have any questions relating to Rm2k/2k3/XP/VX specifically and need help finding answers, I'll gladly do my best to either figure it out for you or hunt them down myself. It also gives me something to discuss on the blog, so feel free! With that I leave you with another screen shot from my current project: Waterside. This is the interior of the restaurant in the town without any Npc's inputted yet.


Rm Link of the post: Rampant Games

Making your Text come AliVe - 2k/2k3


Making your text come Alive
By Breakdancing Robot

      Okay, this feature of RM2k3 may already be known to you; however, I found out about it by a total mistake, and it's GREAT.


      Now, if you've been playing games for a while, then you probably know about MUDs. For those of you that don't know, MUDs are text-based online rpgs. Many people talk about how graphics aren't everything in an rpg; well, MUDs are rpgs at their core. No graphics. Only text. 


      The problem with MUDs comes with the screen. No matter how you look at it, white text on a black background is boring, so creators have found how to make it more interesting. I was pleased to find out this little bit of information about RM2k3. By adding a few text-commands you can turn words into dialogue. Like so:

\\ Shows "\".
\c[n]   Changes the text color to the color that matches n, n being a number from 0 to 19.
\s[n]   Changes the text speed to n, where n is a number from 1 to 20, 1 being the fastest.
\n[n]   Displays the name of the hero in the database with ID n, n being any numerical value. (\n[0] will show the name of the first member in the current party)
\v[n]   Displays the value held in variable n, n being any numerical value.
\$        Shows the amount of money held.
\!         The remainder of the message after this code is only shown when the player presses a key.
\.         Adds a 1/4 second delay to the part of the message which follows this code.
\|         Adds a 1 second delay to the part of the message which follows this code.
\> / \< Displays the part of the message between \> and \< instantly.
\^        Closes the message window without key input.
\_        Shows half a space.

All of these commands can be found by clicking the help button whenever you're at the message prompt. You just throw those badboys in anywhere in the message. For example:
Breakdancingrobot is the KING OF THE WORLD!!!
By adding a few commands you can make it...
\c[11]Breakdancingrobot\c[0] is the KING \.OF \.THE \!WORLD!!! 


By adding those commands, it now has Breakdancingrobot in red, there is a short delay between KING, OF, and THE, and you have to press a button for WORLD!!! to appear. Try this stuff out, you'd be amazed at how much better it makes the dialogue.


Waterside - My Rm2k project

     I just wanted to talk a little about my own Rm2k Project that was on the back burner during my time off, but that I will be getting back into as soon as possible.

It's called Waterside and takes place in a fully customizable town where You, the player have to build up and manage a business and lifestyle while trying to help save your sick grandfather. It's basically a second-life style game with many of my unique systems that have been updated from Jay's One Stop Pop Shop, but what I really am trying to do is immerse the player through the simple story, but unique characters and scenarios that you can play through. Anyways it's still early on with systems being developed, but I'm hoping by February to have an up and running demo. As it stands I've created half the maps of the town and made the main playing area customizable, but still have the smaller houses to work on and then develop the npc's.


I've added some charsets & chipsets that you can check out at the Resources Section. As well as 2 new tutorials.

Rm Link of the post: RPG Maker Soundtrack

Featured Project and Update

     So the featured project I'd like to discuss is Final Fantasy V - II Sacred Chains by: Tezuka at RMRK and Zukain Games. This project has been under close observation by many people since early June, 2008. And has quite the eager following behind, which obviously has captured my attention, so listen up.


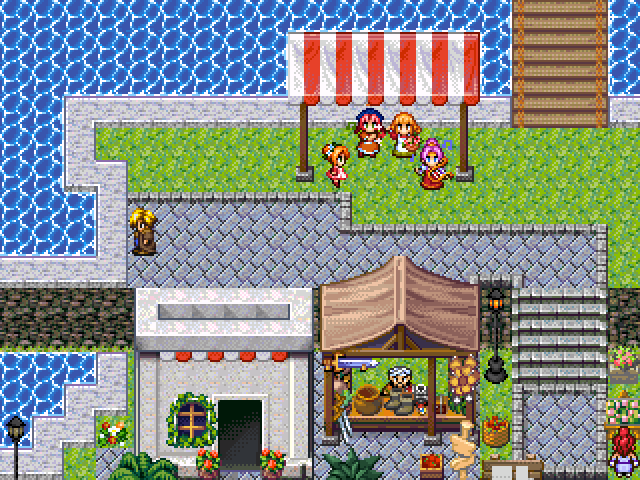
After the battle with Exdeath; Bartz, Lenna, Faris and Krile went their seperate ways.

As Lenna thinks of a way to reunite with her friends, we enter Zeke...

Zeke is a Mage with the power to change the form his magic takes, being it White, Black, Blue or even Arcane magic. Zeke suddenly woke up from being unconscious for an unknown amount of time, due to this, he suffers from memory loss and cannot remember anything except for his name. After waking up, he finds himself in a forest, since he suffers from amnesia, it is a mystery to him. As Zeke wanders the forest, he finds a man in shining blue and white armor camping in the forest...could it be...?

The project is also featured on RMRK. It brings with it a combination of the old and new with both styles and characters based on the original FFV. There's an alpha and beta demo(s) available on the project link if you're interested in testing out the game. Personally I'm glad that someone is working with FFV over the stereotypical choice of 2/4 or 3/6 because V has such a different style compared to either of those.

The battle system seems almost identical to the original with a hint of stylized input from the creator. There's promise of new characters once again in the style, but original, so I'm eager to see who they are.

The Job System has also been taken advantage of and improved with new skills available.

As many others I'm excited to see how far Tezuka will go with the project and I hope he can have a complete demo if not first release up sooner than later before the public gets weary of waiting. Great Job and I look forward to your work!

Official Project link: FFV - Zukain Games

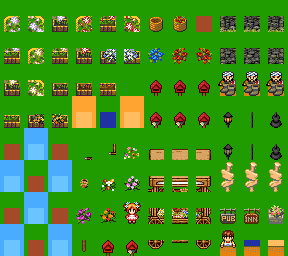
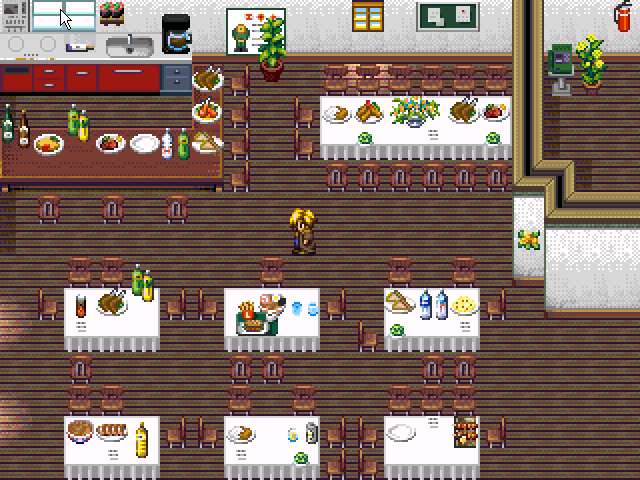
I've added some more resources from my old site. You can check them out at the Resources Section.

Making a readable page using Pictures
By: Hawkeye

     First you must have a picture made of what it is you intend to have your hero read.
     There are several empty parchment pictures around and all you can simply do is open one in Paint or Idraw and edit it to have words written on it. Save the picture and put it into the picture folder in your game's folder. Next in your game make an event of a piece of paper lying somewhere and you can place it wherever you want the hero to find it, such as on a desk. Set the EVENT START CONDITION to PUSH KEY and the POSITION to SAME LEVEL AS HERO. Next in the event commands box put in a message saying something like READ LETTER? Then under that make a SHOW CHOICES command with two choices reading something like YES and NO, leave the NO command blank. Last in the command box, under the :[YES] case put in a CHANGE SWITCH command and make the switch something like PAGE1 if you like and set it to ON. So in the command box what you should have is

<>Message: READ LETTTER?
<>Show Choice: YES/NO
:[YES] Case
<>Change Switch: Var[00??:PAGE1] Switch ON
<>
:[NO] Case
<>
:End Case
<>

The ?? representing the number of switch you use. That's all you need to do in this event box. Now go into the DATABASE and into COMMON EVENTS and make a new event such as LETTER1. Set the common event to PARRALEL PROCESS and make the appearance condition switch the same switch you used in the last event, so we used PAGE1 so that would be the same switch to use as the appearence condition switch. Now in the event commands area this is the coding we're going to put in. First make a SHOW PICTURE command and set the picture to whatever picture you made earlier with writing on parchment and you can leave the positioning and rest alone as the default settings and click ok now. Next make an ENTER PASSWORD command and set the variable to something like READPAGE and check off WAIT UNTIL KEY HIT, DECISION(5) and CANCEL(6) leave DIRECTION(1,2,3,4) unchecked and now click ok. Last command to put in is an ERASE PICTURE command to erase whatever pic number was the picture you just placed, the default setting is pic one.

     That's all the coding there is, you can't go wrong with it, though there are simpler ways and shorter ways this is one of your best bets in my opinion to go with. So the coding for the common event will look somewhat like this is the end...

<>Show Picture:ID:1 PAGE1(160,120)
<>Enter Password: Var[??:READPAGE]
<>Erase Picture:ID:1
<>


Rm Link of the post: Home brew games

Megaman Legends

Megaman Legends
Personally I believe this to be one of the most amusing games I've ever played and it just keeps getting better each time I play it, there's loads of great features and original gamepley with ridiculously fun characters. I would rate this game 7.5/10 only because the graphics could have been better even for it's age and the intro music is annoying.

GRAPHICS:
As I mentioned earlier they could have been better, but for an early playstation game they weren't horrendous. The fact that everything was squarish was a down fall because I know in the sequel only done a little later, the graphics were brilliant. Your cut offs for areas to travel don't flow properly and you just sort of stop walking the moment you hit grass you cant go on, and if you cant jump on something then you just hit it and fall down, even though you jumped higher than it. So, graphics to me could have been improved along with the coding of the maps even for the time when this game was made.

GAMEPLAY:
The gameplay for this game was great, you really get into it and it's got such a basic storyline that everything makes sense. It's not very optional, no because you're pretty much told where to go always, but considering it was made for a younger audience it's completely understandable. The fact that I got into it was cool because it still keeps me amused at my age, which is how you know it was done well when it can appeal to an older audience as well. I loved the gameplay for this game and it deserves to be marked great.

MUSIC:
The music for the most part was original and well composed, the sound effects were a bit repetitive though and the introduction music gets on your nerves the second time you hear it, and the third and the fourth and it keeps getting more annoying every time afterwards, but that's a minor problem. I liked most of the music and found the town's were always very well done and catchy too, which is always good. So, overall I liked the music for the most part.

OTHER:
The mini-games were basic, but fun none the less and the tons of side-quests always keep you interested, who would have known kicking a can into a bread shop was this fun. The loading time for saving was a tad long and could have been better, but for playstation I wasn't surprised. A few notes also; this by far is better than the 2 sequels, was released on both N64 and PS1 however had an expansion for Nintendo, well worth a play even if it is dated.


Rm Link of the post: Gaming Ground Zero

Monday, November 15, 2010

Joining the community

     So I'm jumping right back into the RPG Making World. I've joined another forum: and started following 3 new blogs of people doing similar rpg making and following as I. You can check out a new Rm Link at the bottom of every post I make. They will be to sites and blogs that have caught my interest in the community. If you'd like me to follow your work or review anything you've done please feel free to send me an e-mail/private message or comment on any post and I'll gladly take the time to look at your work.

I've added some chipsets from my old site. You can check them out at the Resources Section.

 Taking a Screenshot of your game

    This tutorial is quite simple once you get the hang of it and is mostly meant for newbies. I know it's something most people know, but it's easily looked over and I continuously see people with poor screenshots and wonder, why?

-STEP 1- First off, open your game up and start playing it.

-STEP 2- Get to the part of your game where you'd like to take a screen shot.

-STEP 3- Look on your keyboard for the button PRINT SCRN and press is.

-STEP 4- Close your game and open PAINT or another picture program and hold CTRL and press V while you're holding it. You could also goto EDIT and click on PASTE or PASTE PAGE, but where's the fun in that. That's all there is to it, you press PRINT SCRN which takes a picture of your whole computer screen and then you open up and image program and press CTRL + V and paste it on the image program where you can save it as a BMP, but a PNG or JPEG takes up a LOT less room on your computer.

Rm Link of the post: RPG Maker Times

The early stuff

      So I took the liberty of starting to add all my old resources to the blog. You can check them out at the Resources Section. So far it's all of my original Charsets created for my games by me. These are Rm2k/2k3 resources, but can be compatible for XP with some modification.
     I joined Crankeye: The RPG Maker Resources Kit by Crankeye an old affiliate of mine that's still in existence and by the look of it going very strong. They have a fabulous forum that's extremely active and a very nice assortment of resources and members, definitely worth a check out.

     I plan on posting Tutorials in a section once I get it setup, but until then I'll be placing them in posts. Here's one from my site made by staff member Tomparkca on:


Making your RPG stand-alone without the RTP

This is important to people who have downloads available for rpgmaker2000 or rpgmaker2003 whether they be games or demos. If you do this you can make your games stand alone so you(the player) don't need rpgmaker 2k/2k3 or the RTP to play them.

-STEP 1- First off, make sure you have all the resources the game needs in the game folder on your drive.

-STEP 2- Remember to include the RPG_RT.exe file. It's a good idea to
make sure you run your virus scanner before packing up your game just in case.

-STEP 3-This is the most important... Open the RPG_RT.ini file, and add the line "FullPackageFlag=1". This tells the game that it doesn't need to look for the RTP, and all the files are there. If you don't do this, the user will get errors saying they have to install RM2k or RM2k3.

-STEP 4- Then just pack up your game like normal and you're done, now people dont need the rtp files to play your game. This can work on games you downloaded and you want to play, but can't because you dont have the rpgmaker 2k/2k3 rtp files, just do step 3 on the game you downloaded.

RM Link of the Post: Mr Bubblewand's Blog

Getting back into it

     It's funny trying to get back into something you used to be really good at. I'm not saying I was the world's greatest Rpg Maker, but I had a steady following of people ready and eager to play my games and listen to whatever advice I had to give them.

     That being said jumping back into this is not going to be easy because I've realized that I don't know the first thing about any of the new makers nor do I know anything about coding a website anymore, which is why I chose to go with a blog instead. I'm hoping that the more I delve into the world of Rpg making, the better blogger I'll become and the more whatever it is I have to say will not be jibberish and people might actually start paying attention.

     I plan on hosting all of my old original resources and linking to downloads of my games/demos as well as keeping you posted on my current projects. Mostly though this blog will be about other people's work and act as a bridge between all the dying rpg making websites and new uprising ones and their members both old and new to connect and see what everyone's up to.

I am also heavily into Theatre, Acting, Directing and the Arts and I'm not going to lie, but I may try and be crazy and bring that into this blog. Wouldn't that be just wacky!? Theatre and RPG making!?!?

KR deserves recognition for keeping me going during my time off: KR

What's left of my old, once flourishing website from 2006: Hawk Games

Rm Link of the post: A Fragmented Memory RMing Blog